Deployment readiness (environment)
1. Overview
When the project is developed, we need to deploy, and we need to describe three deployment modes, server deployments, docker deployments, k8s deployment
Before deploying, we have installed relevant intermediaries. Our cicd is based primarily on gitlab and jenkins (three ways will be used), mirror storage using harbor(docker, k8s deployment needs to be used), a k8s cluster environment (k8s deployment).
Middleware for service use (mysql, redis, es etc.) will be deployed in srv-data.com, if you are online using cloud service and if you build it better than k8s.
So we need to configure the following:
| Server Name | Role |
|---|---|
| deploy-server.com | Deployment of gitlab, jenkins, harbor (prepackaged docker, docker-compose) |
| srv-data.com | Deployment of mysql, redis, es et al., simulate an independent environment, k8s internal connection to this server |
| nginx-gateway.com | Gateway, independent from k8s cluster |
| k8s cluster | K8s Cluster |
2. Build gitlab
2.1. Build gitlab
Creating folders
$ mkdir gitlab && cd gitlab
$ vim docker-compose.yml
docker-compose.yml
version: "3"

services:
  gitlab:
    image: "twang2218/gitlab-ce-zh"
    container_name: "gitlab"
    restart: always
    hostname: "192.168.1.180" #部署机器的ip,非容器ip(因为是本地不是线上所以用ip,线上的话可以用域名)
    environment:
      TZ: "Asia/Shanghai"
      GITLAB_OMNIBUS_CONFIG: |
        external_url 'http://192.168.1.180'  #使用这个地址访问gitlab web ui(因为是本地不是线上所以用ip,线上的话可以用域名)
        gitlab_rails['gitlab_shell_ssh_port'] = 2222 #ssh clone代码地址
        unicorn['port'] = 8888 #gitlab一个内部端口
    ports:
      - "80:80" #web 80 端口
      #- '443:443'      #web 443 端口,本次未使用就不开放了
      - "2222:22" #ssh 检出代码 端口
    volumes:
      - ./etc:/etc/gitlab #Gitlab配置文件目录
      - ./data:/var/opt/gitlab #Gitlab数据目录
      - ./logs:/var/log/gitlab #Gitlab日志目录
Run
$ docker-compose up -d
This execution may take a little long! Let's go to the cup to rest again!
2.2 Visit gitlab
Visit http://192.168.1.103 (i.e. http://"docker-compose")
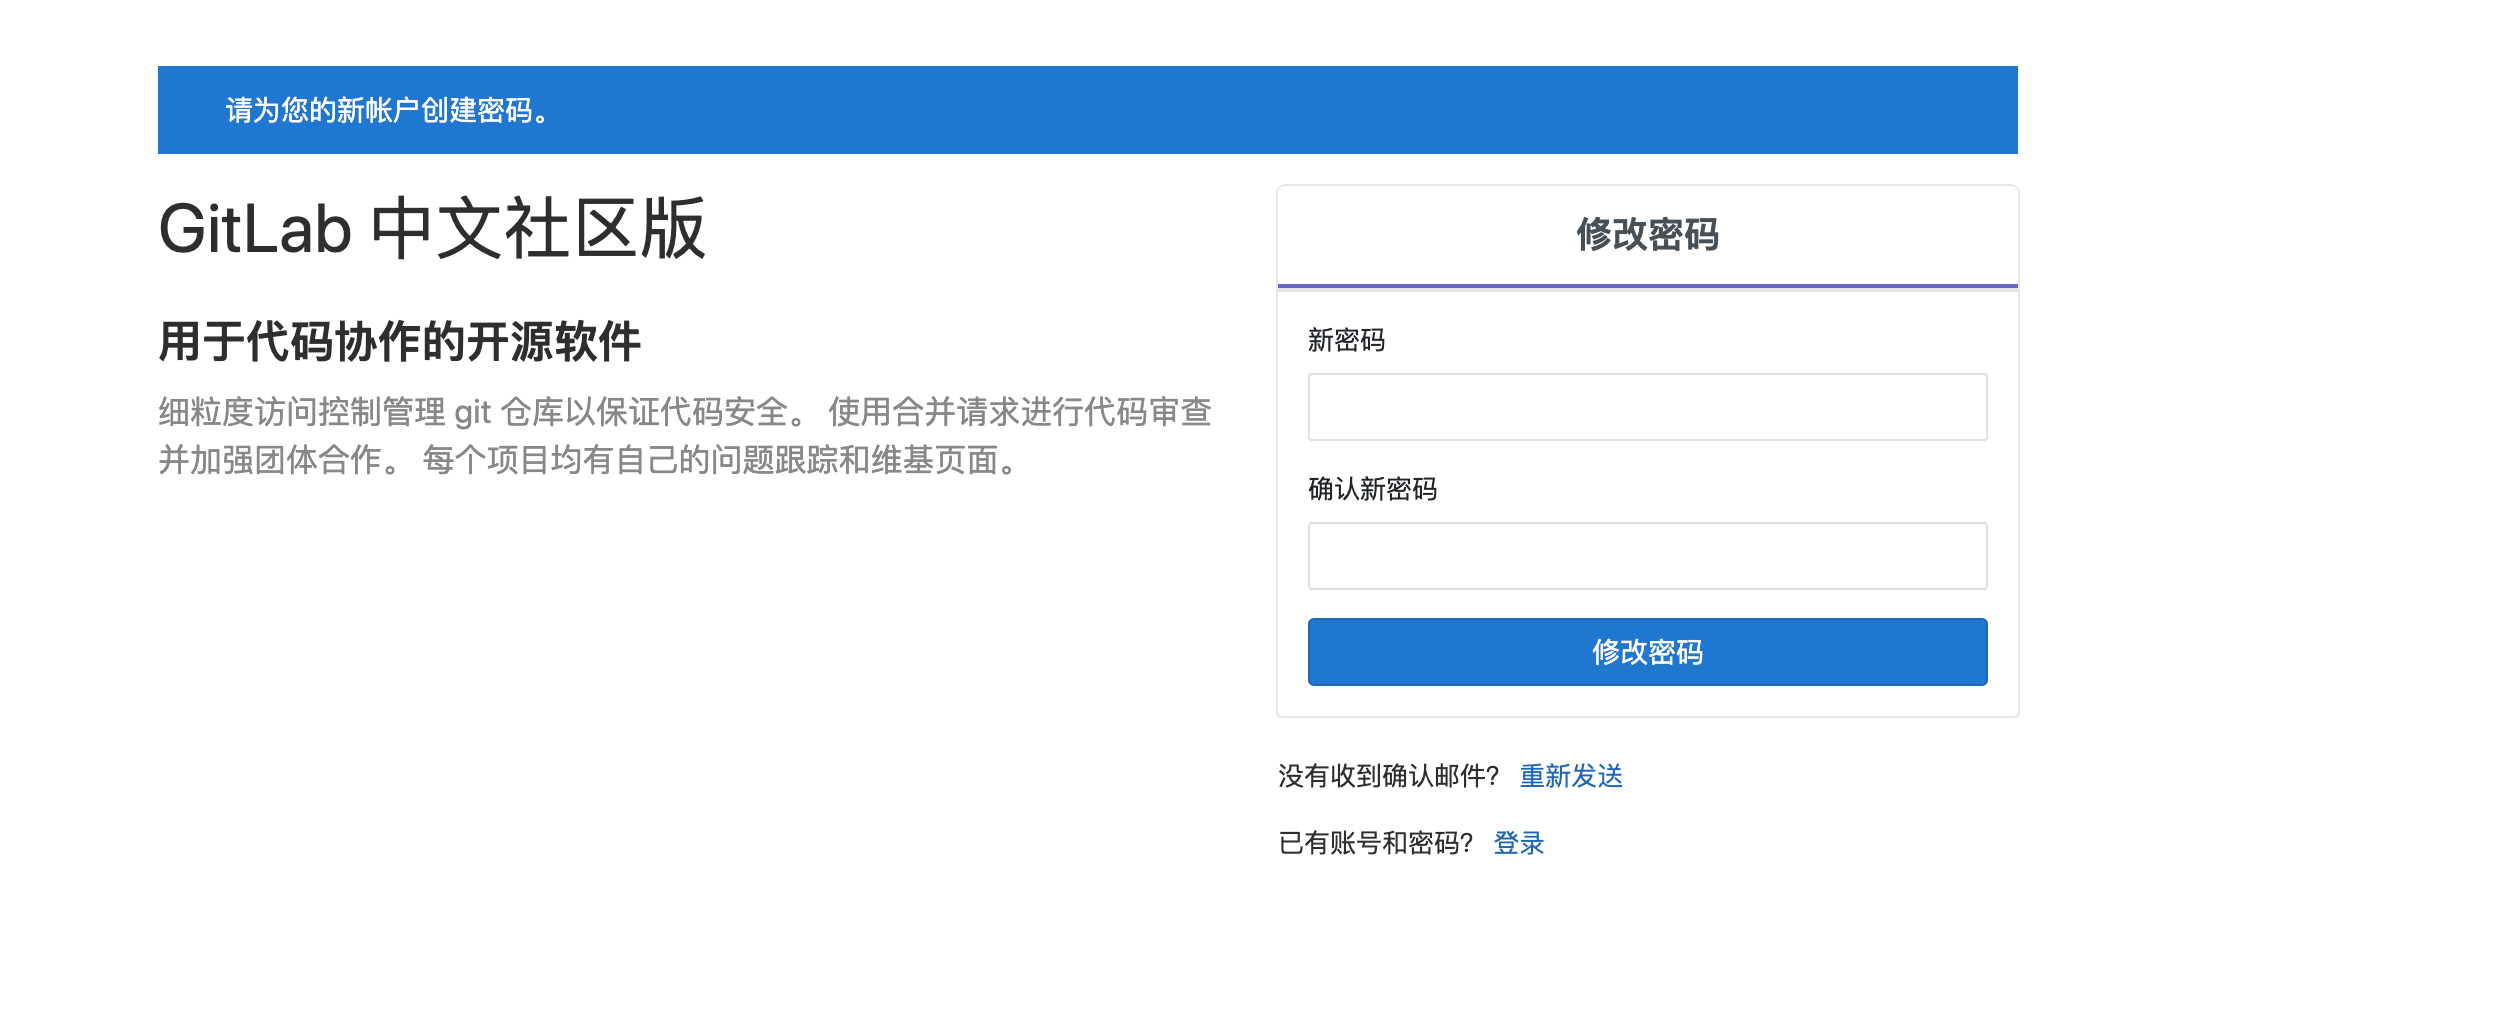
Account default is root
2.3 Create project k8scode
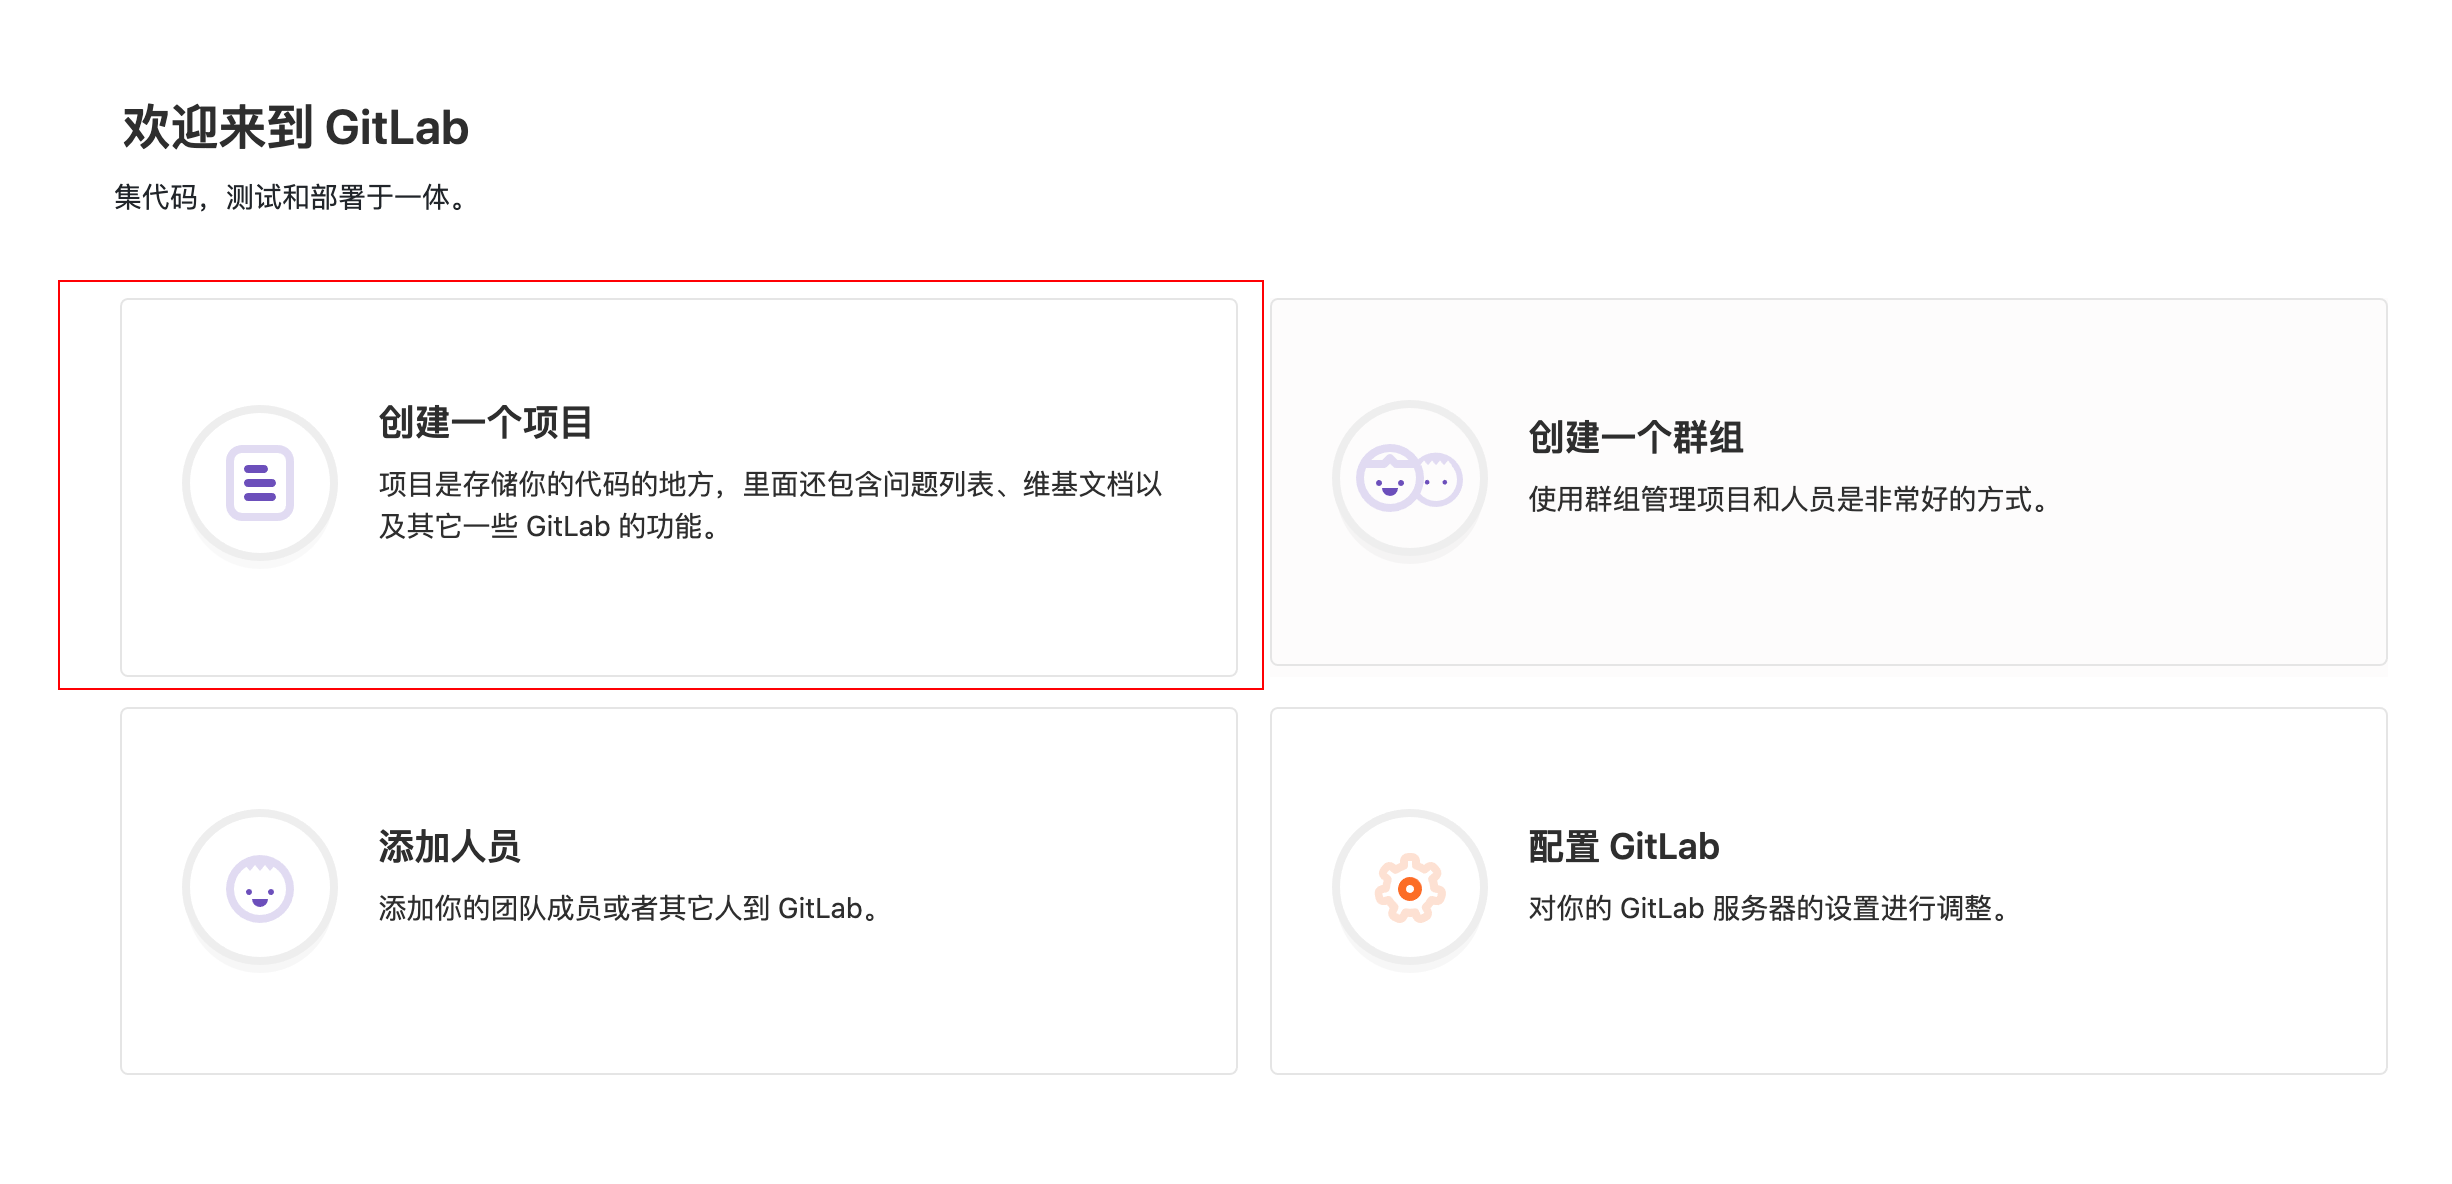
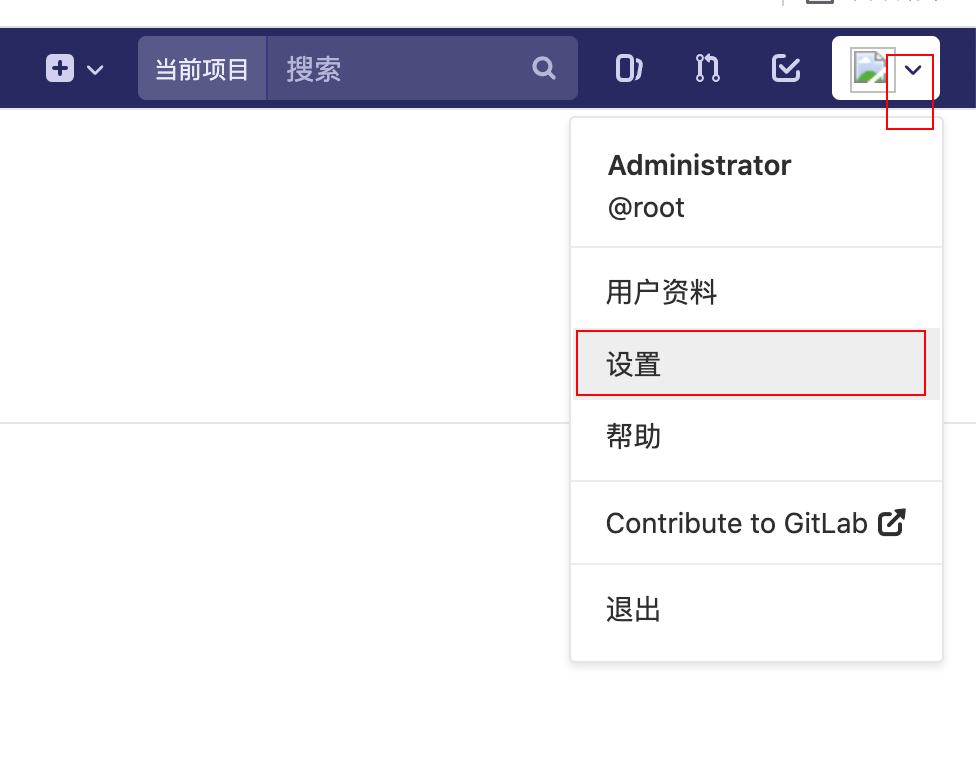
2.4 Configure ssh public key
Click on the arrow under the avatar position, "Settings"
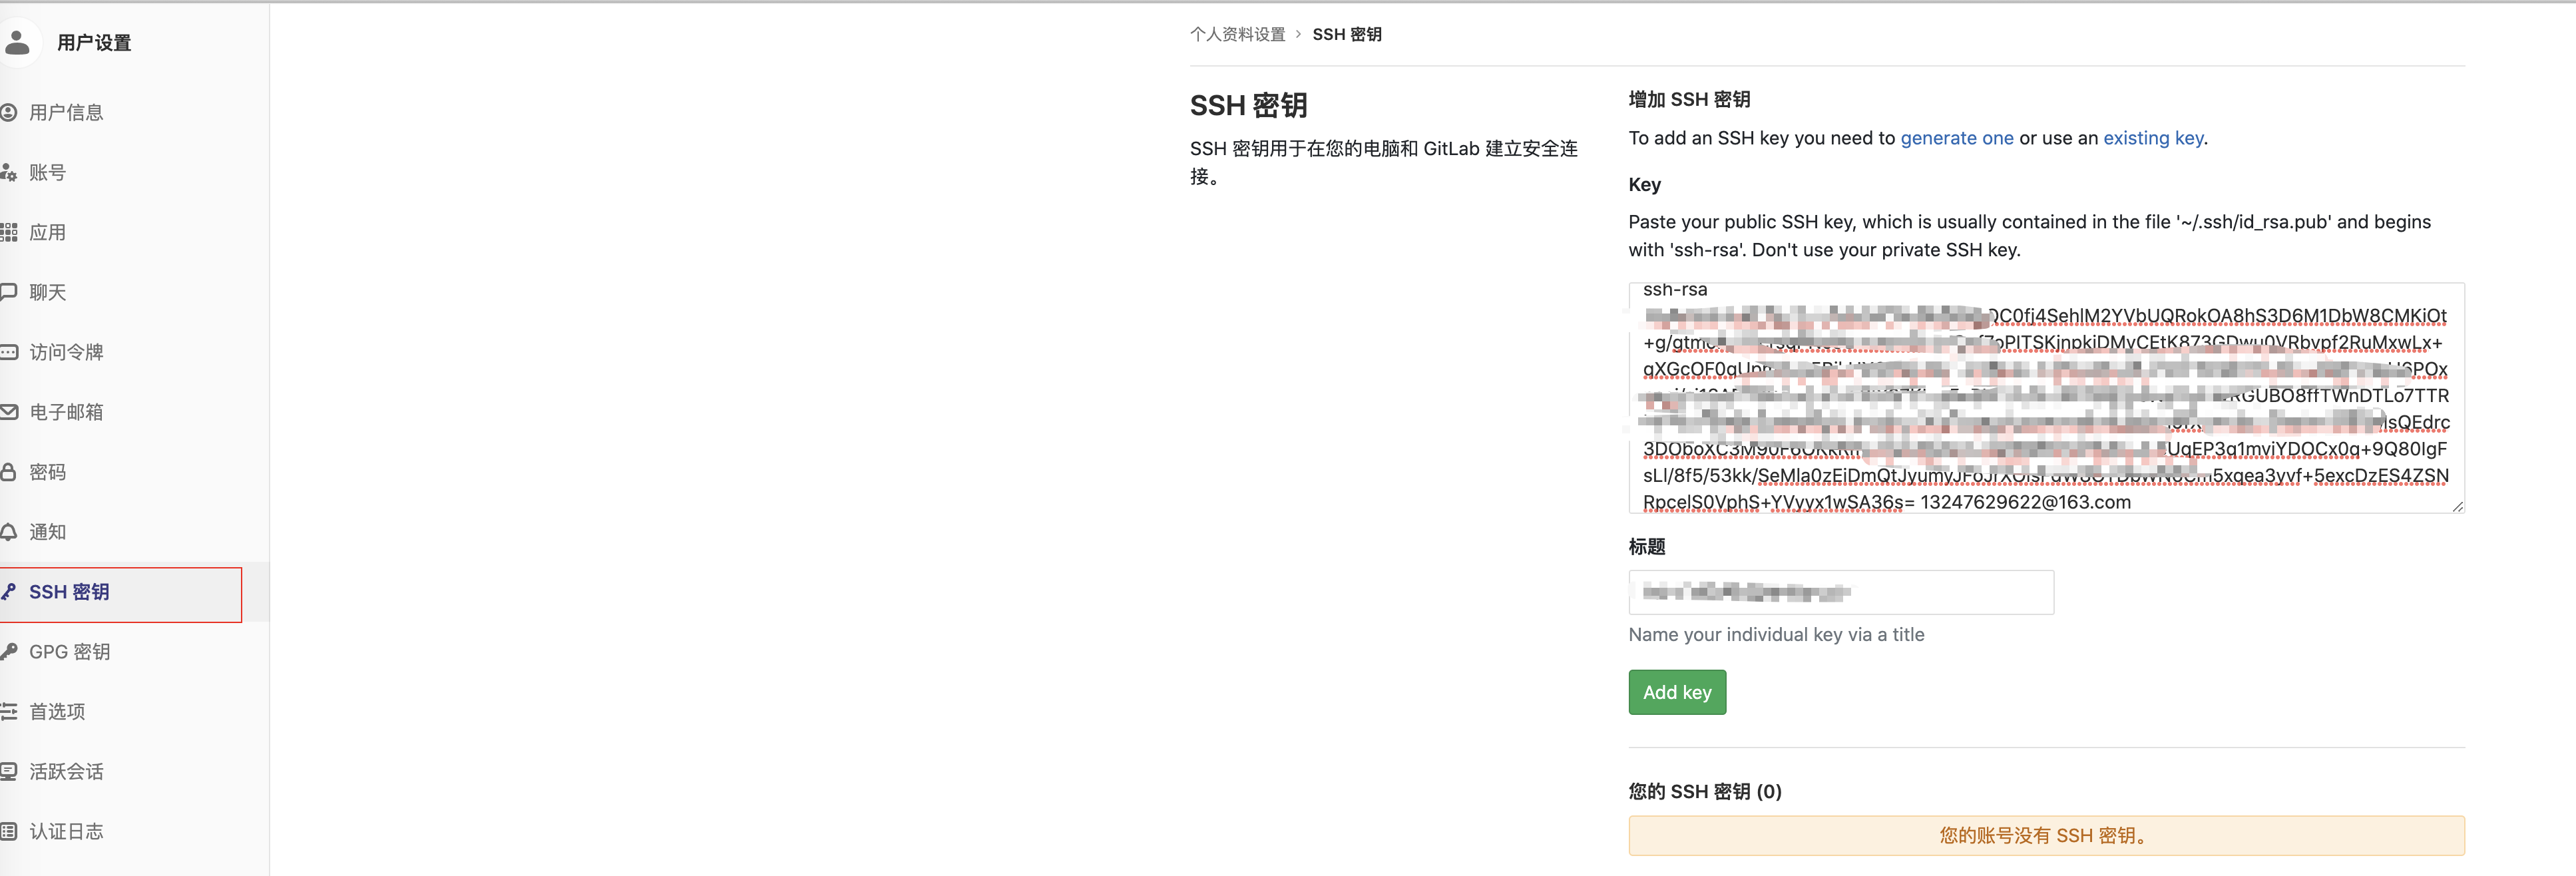
Configure your own public key, click "Add key" (your own search will not be generated by the public key, is not detailed here)
2.5 Upload Project
Click on the project, go back to the project just created and upload the k8scode project to this repository ssh:/git@192.168.180:2222/root/k8scode.git is enough to finish our gitlab build.
3、harbor
3.1 Deployment of harbor
Download harbo harbo https://github.com/goharbor/harbor/releases/download/v2.2.0/harbor-offline-installer-v2.2.0.tgz
Enter the harbor folder after downloading
$ cd harbor && cp harbor.yml.tmpl harbor.yml
We open harbor.yml, modify the following
hostname: 192.168.1.180 #修改为本机ip,不能使用localhost、127.0.0.1

http:
  port: 8077 #改一下http端口8077

#https: #暂时将https注释掉,我们先不通过https只铜鼓http
#  port: 443
#  certificate: /your/certificate/path
#  private_key: /your/private/key/path

data_volume: /root/harbor/data #修改一下数据目录位置

log:
  level: info
  local:
    rotate_count: 50
    rotate_size: 200M
    location: /root/harbor/log #修改一下日志目录位置
Run "sudo ./install.sh" directly to wait a little longer.
3.2 Visit harbor
Browser input http://192.168.1.1180:8077
Account: admin
Password: Harbor12345 (recorded in harbor.yml, default is Harbor12345)

Login successful

This is our halbor build.
4、jenkins
4.1 Deployment of jenkins
Creating folders
$ mkdir jenkins && cd jenkins
$ vim docker-compose.yml
docker-compose.yml
version: "3"
services:
  jenkins:
    image: "jenkins/jenkins:lts"
    container_name: jenkins
    restart: always
    environment:
      - TZ=Asia/Shanghai
    user: root
    ports:
      - "8989:8080"
      - "50000:50000"
    volumes:
      - "./jenkins_home:/var/jenkins_home"
      - "/var/run/docker.sock:/var/run/docker.sock"
      - "/usr/bin/docker:/usr/bin/docker"
      - "/root/port.sh:/root/port.sh"
[Note]: /root/port.sh is for subsequent k8s deployment
#!/bin/sh

case $1 in
"identity-api") echo 1001
;;
"identity-rpc") echo 1101
;;
"usercenter-api") echo 1002
;;
"usercenter-rpc") echo 1102
;;
"message-mq") echo 1207
;;
"mqueue-rpc") echo 1106
;;
"order-api") echo 1004
;;
"order-mq") echo 1204
;;
"order-rpc") echo 1104
;;
"payment-api") echo 1005
;;
"payment-rpc") echo 1105
;;
"travel-api") echo 1003
;;
"travel-rpc") echo 1103
esac
Run
$ docker-compose up -d
This time is not slow. Can drink a cup of coffee
4.2 Mount Tools
1)将 goctl 复制到 jenkins 容器中
$ docker cp $GOPATH/bin/goctl jenkins:/usr/local/bin
$ docker exec -it jenkins /bin/sh #进入jenkins 容器
$ goctl -v   #验证成功
goctl version 1.3.0-20220201 linux/amd64
2)将 kubectl 文件复制到 jenkins 容器中
$ curl -LO "https://dl.k8s.io/release/$(curl -L -s https://dl.k8s.io/release/stable.txt)/bin/linux/amd64/kubectl"
$ sudo chmod a+x kubectl
$ docker cp kubectl jenkins:/usr/local/bin
$ docker exec -it jenkins /bin/sh #进入jenkins 容器
$ kubectl version
Client Version: version.Info{Major:"1", Minor:"23", GitVersion:"v1.23.3" .....
3)将 k8s 的配置.kube/config 复制到 jenkins 容器
$ docker cp ~/.kube jenkins:/root/ #前提是家目录下的.kube文件夹中存在k8s的config配置
$ docker exec -it jenkins /bin/sh #进入jenkins 容器
$ kubectl ge ns
default              Active   43m
kube-node-lease      Active   43m
kube-public          Active   43m
kube-system          Active   43m
local-path-storage   Active   43m
These 4 parts above can also be hit directly in the mirror, and I leave it to you yourself.
4.3 Visit to jenkins

The first visit does not panic. Let you wait a little while it is ready to jump to the landing page when it is ready.
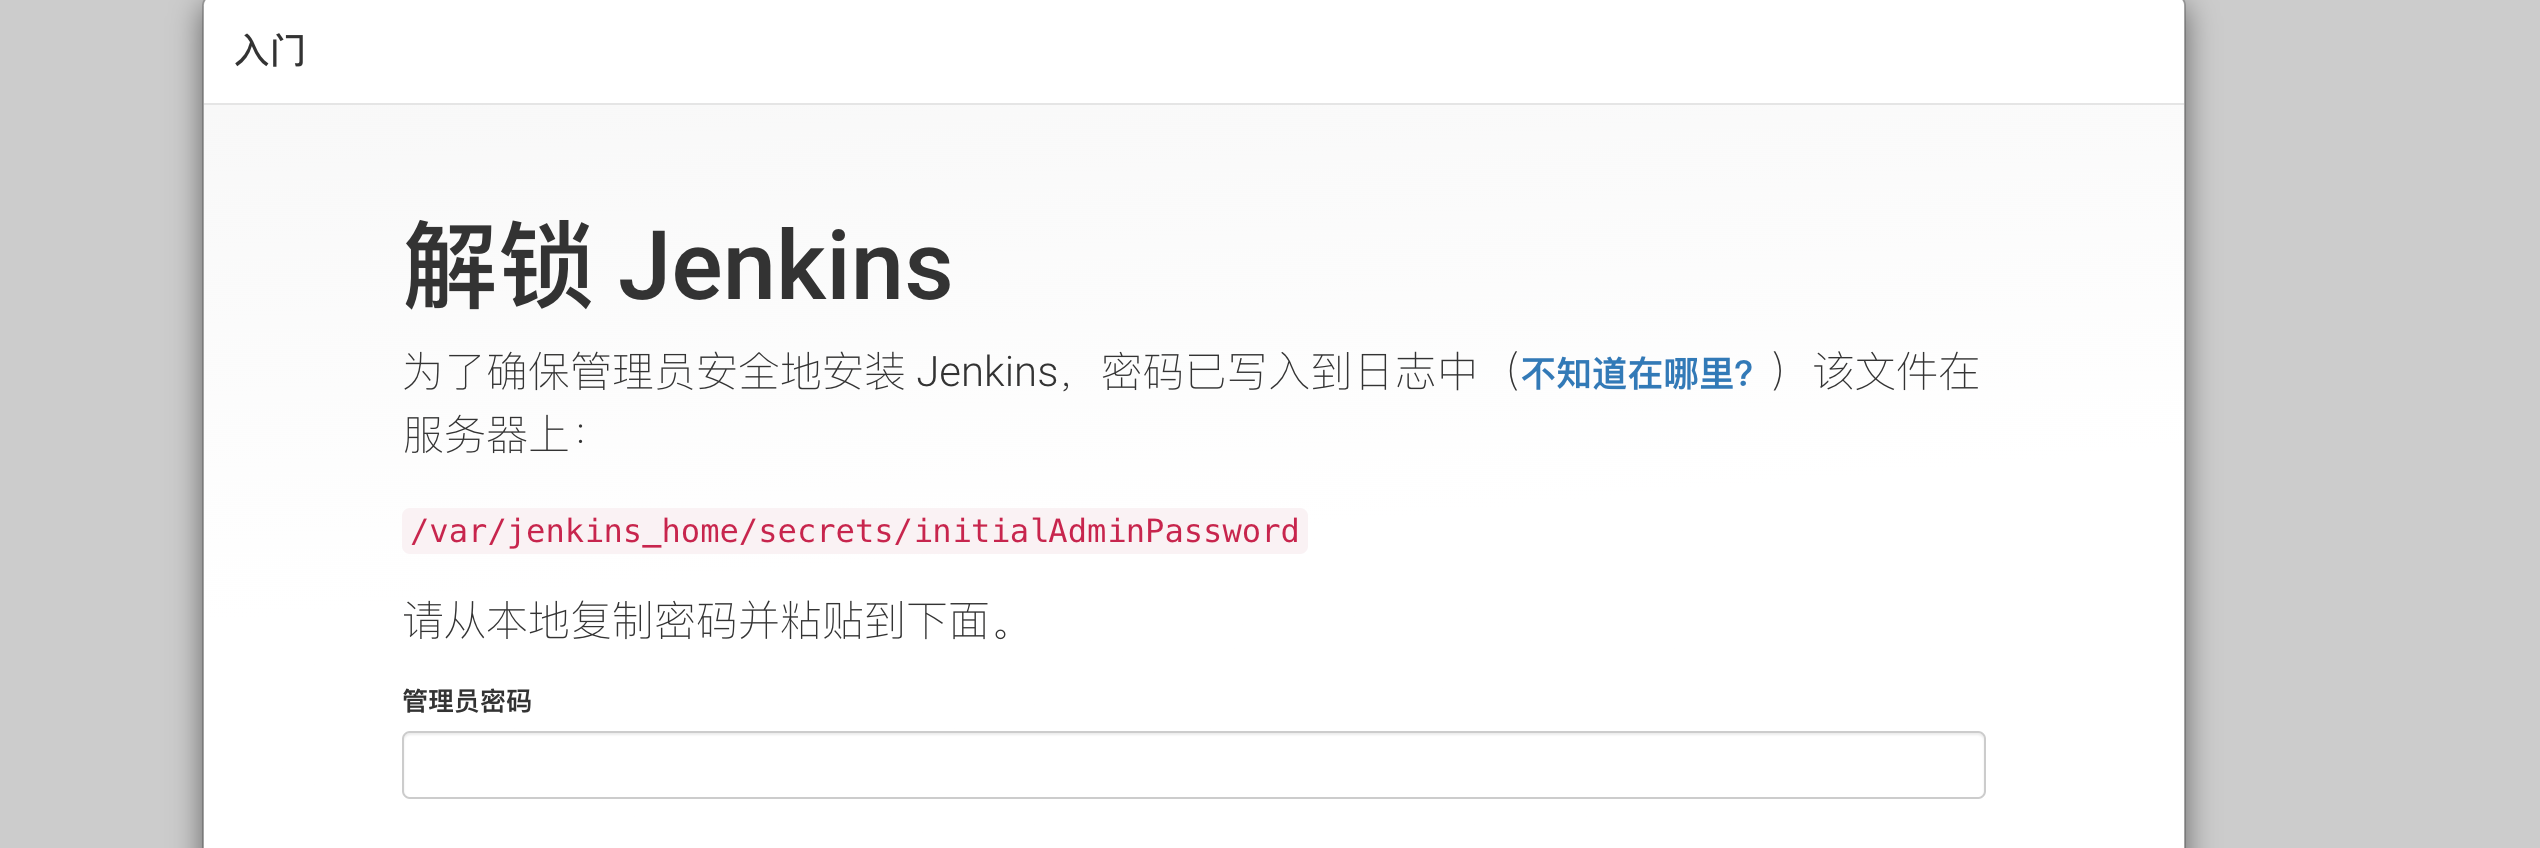
The following interface is ready because our directory is mounted. We see your native jenkins_home/secrets/initialAdminPassword password, enter the next step
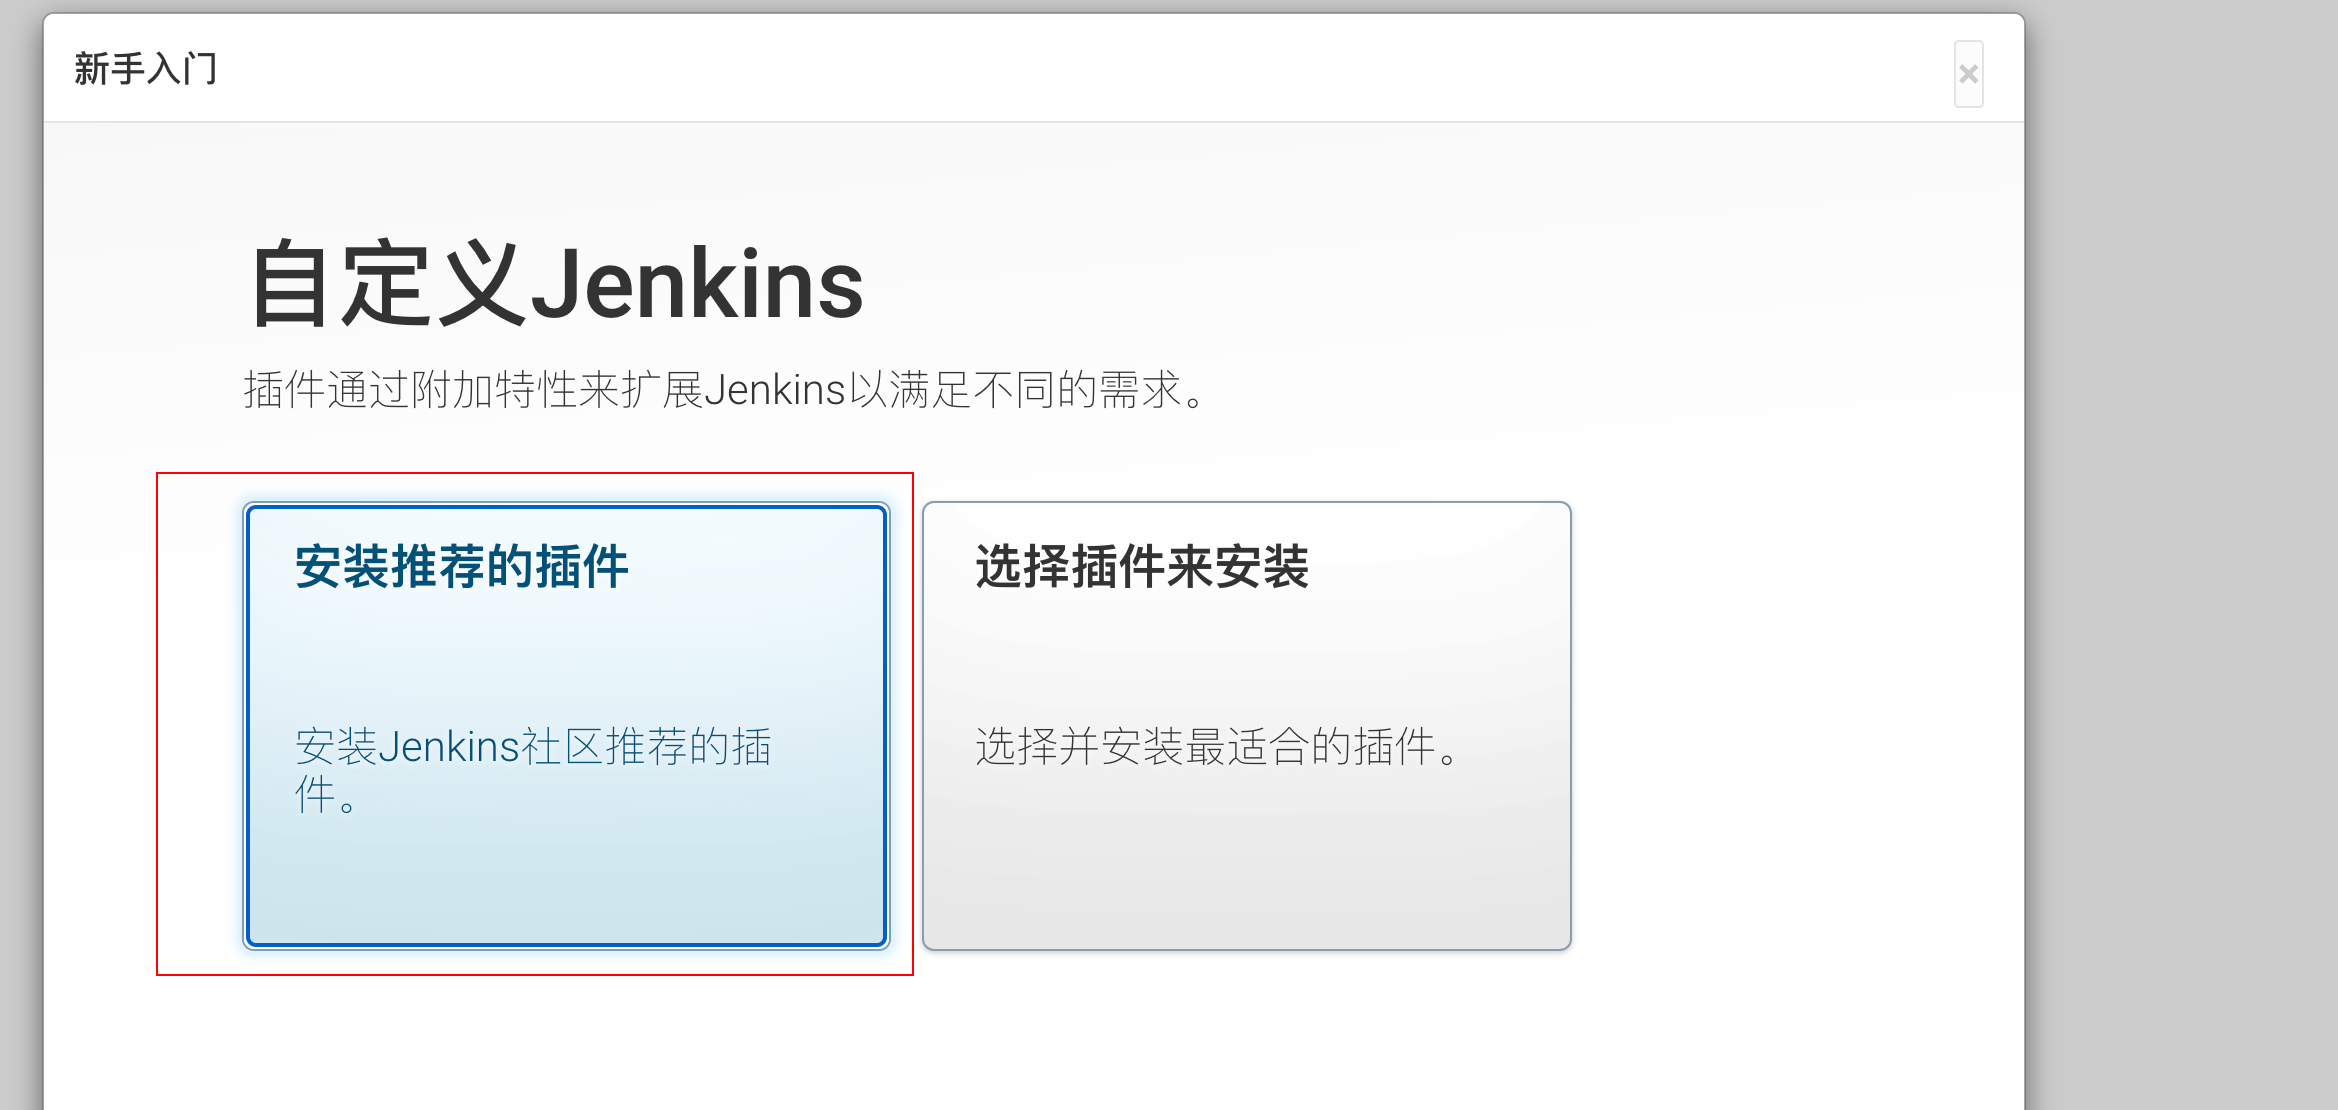
Select "Install Recommended Plugins"
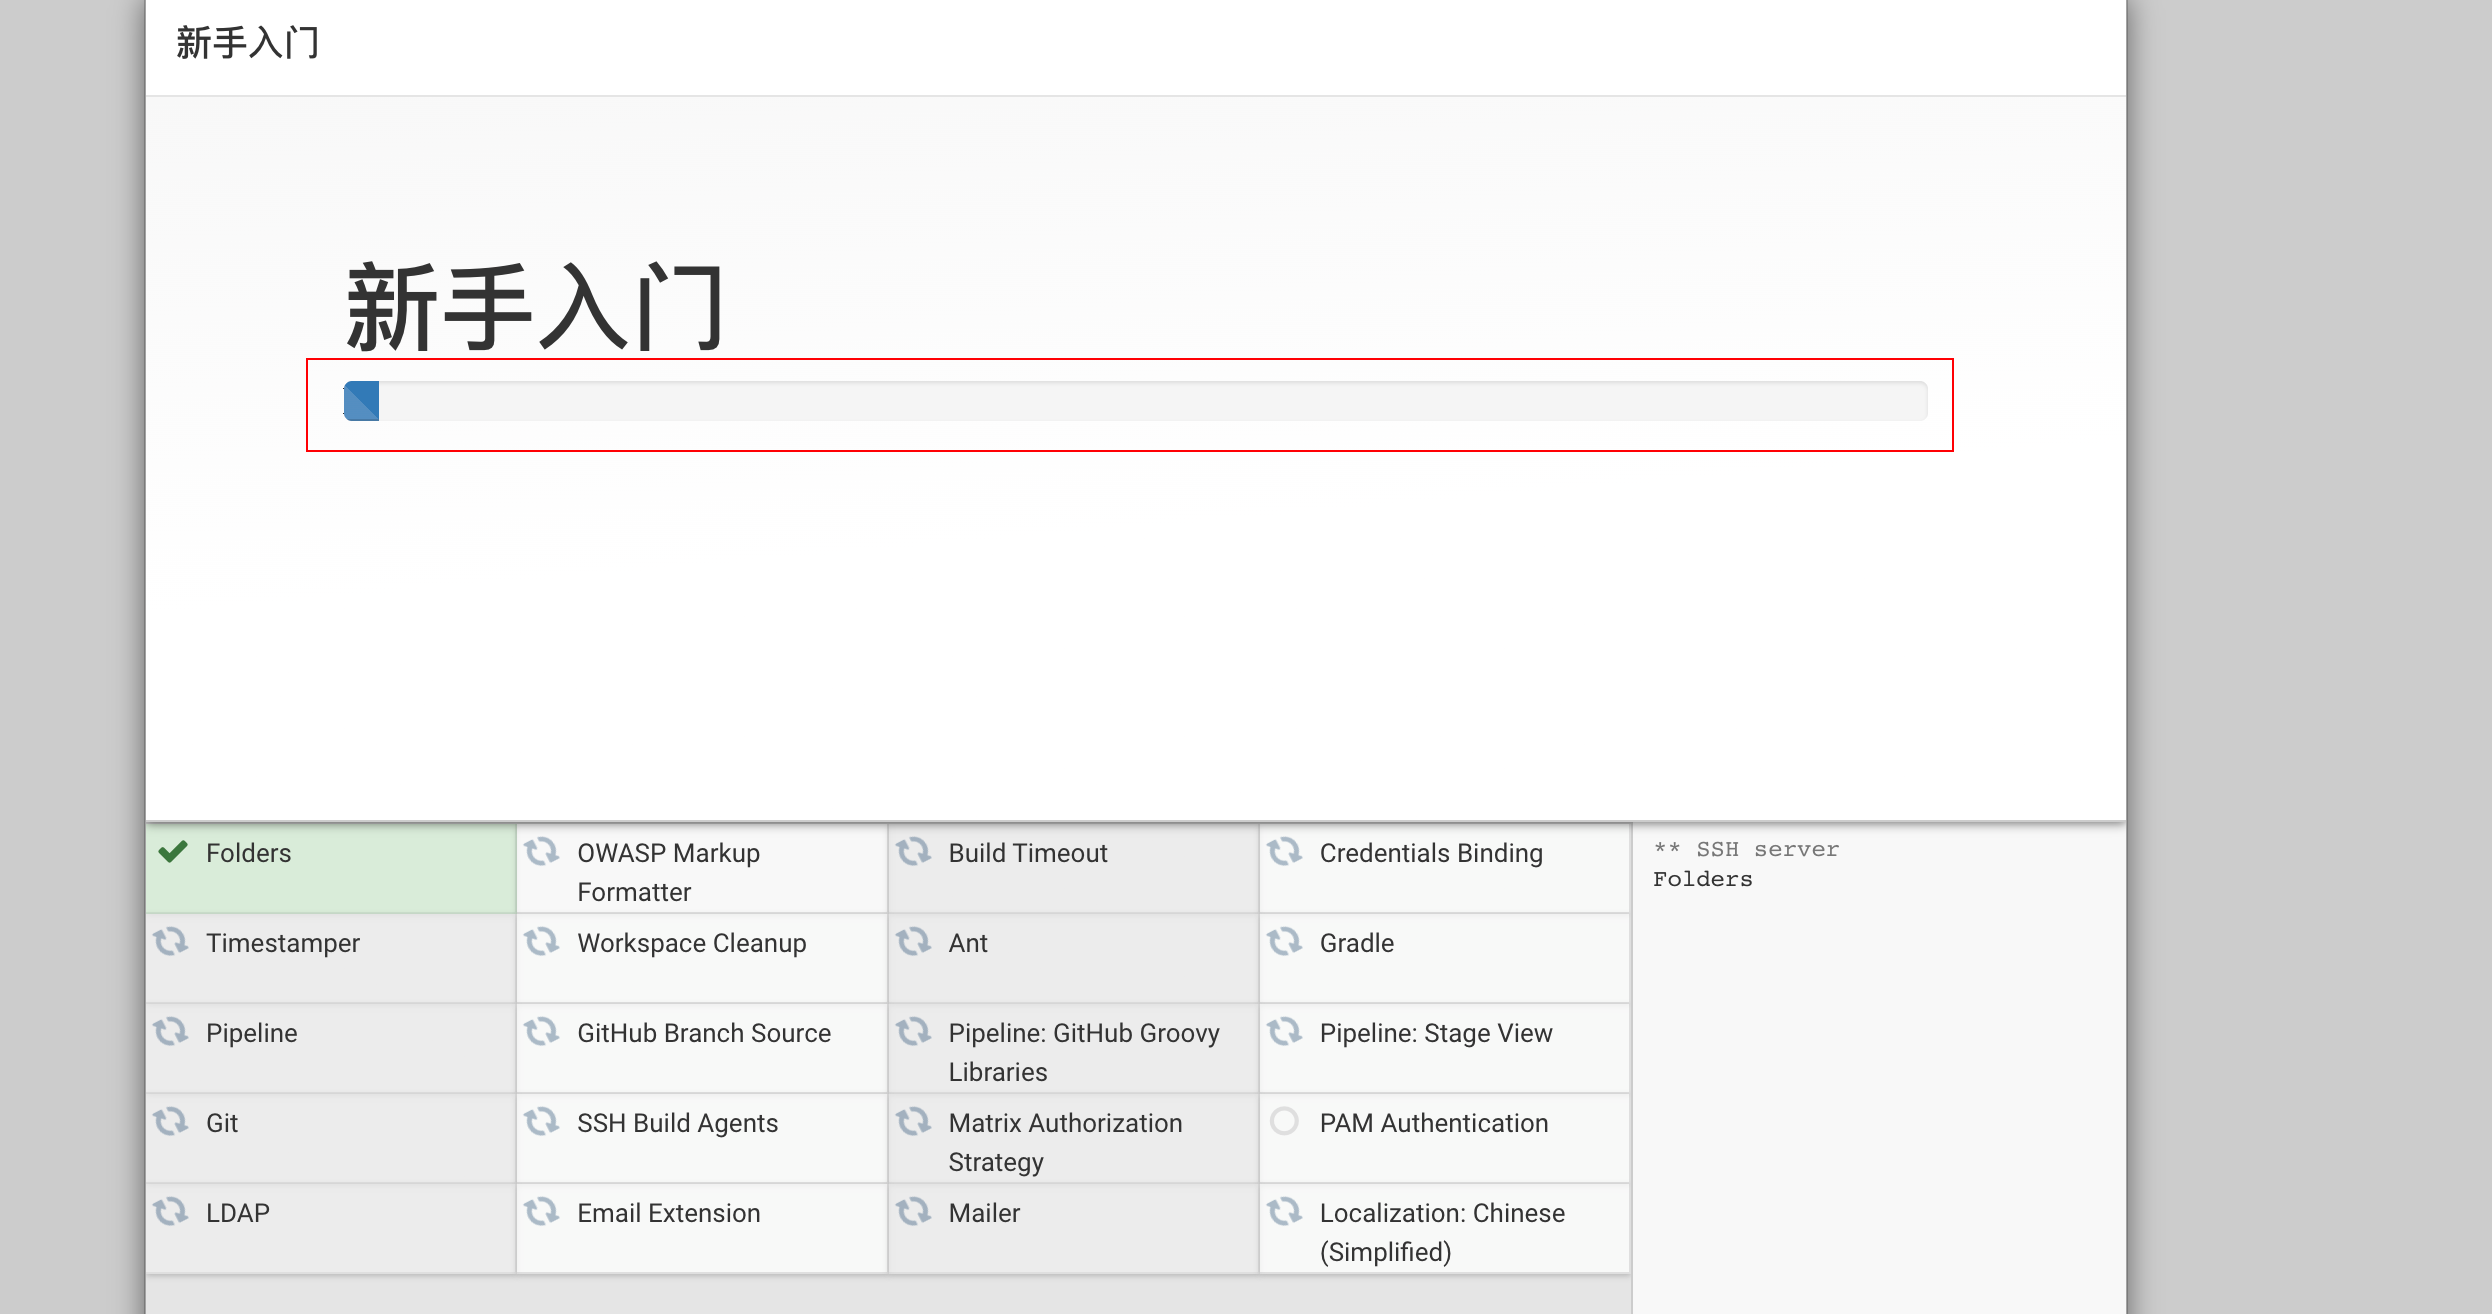
Then wait until the plugin is installed
4.4 Create User
root
root

4.5 Deployment Complete

Deployed to this jenkins
4.6 Add credentials
Click on the left menu "Manage Jenkins"
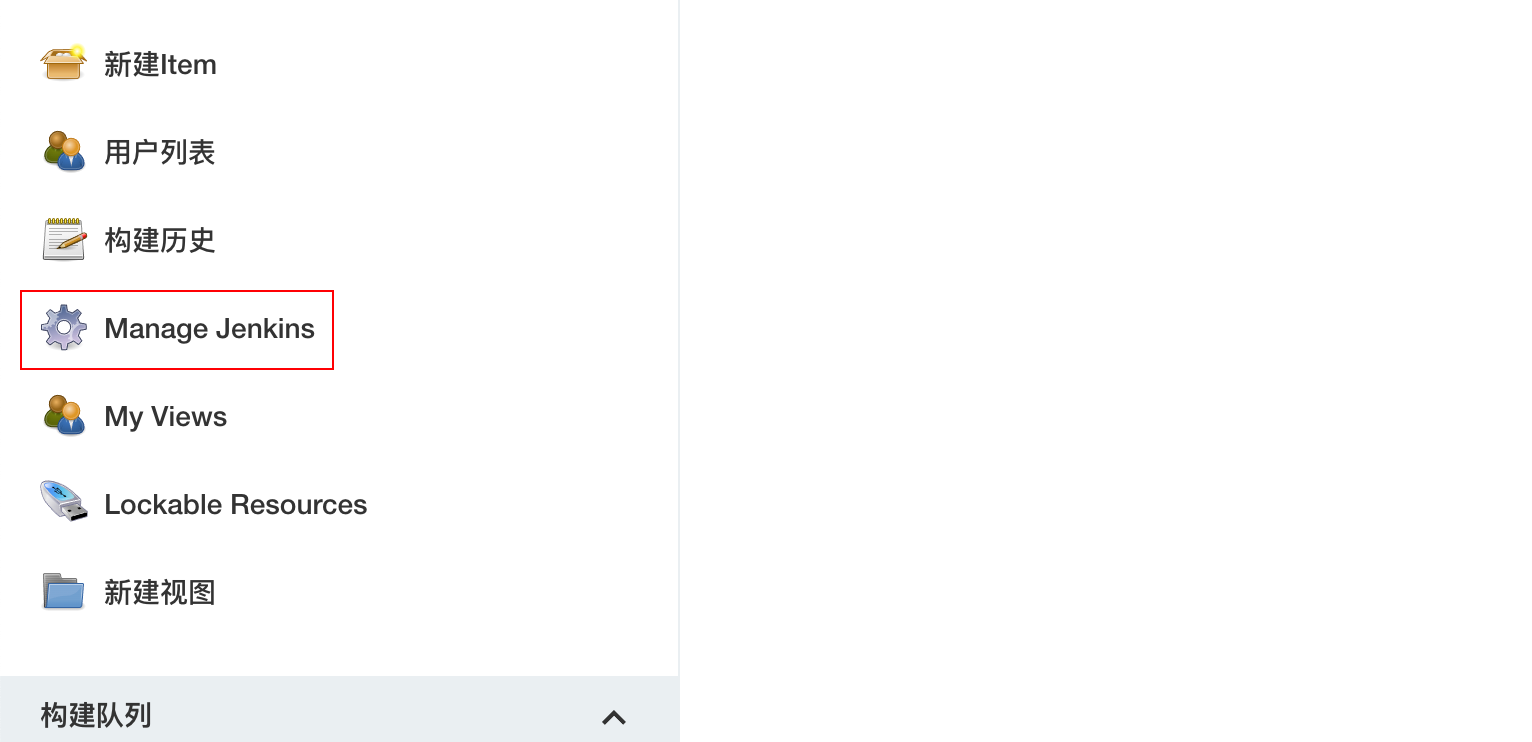
Click "Manage Credentials"
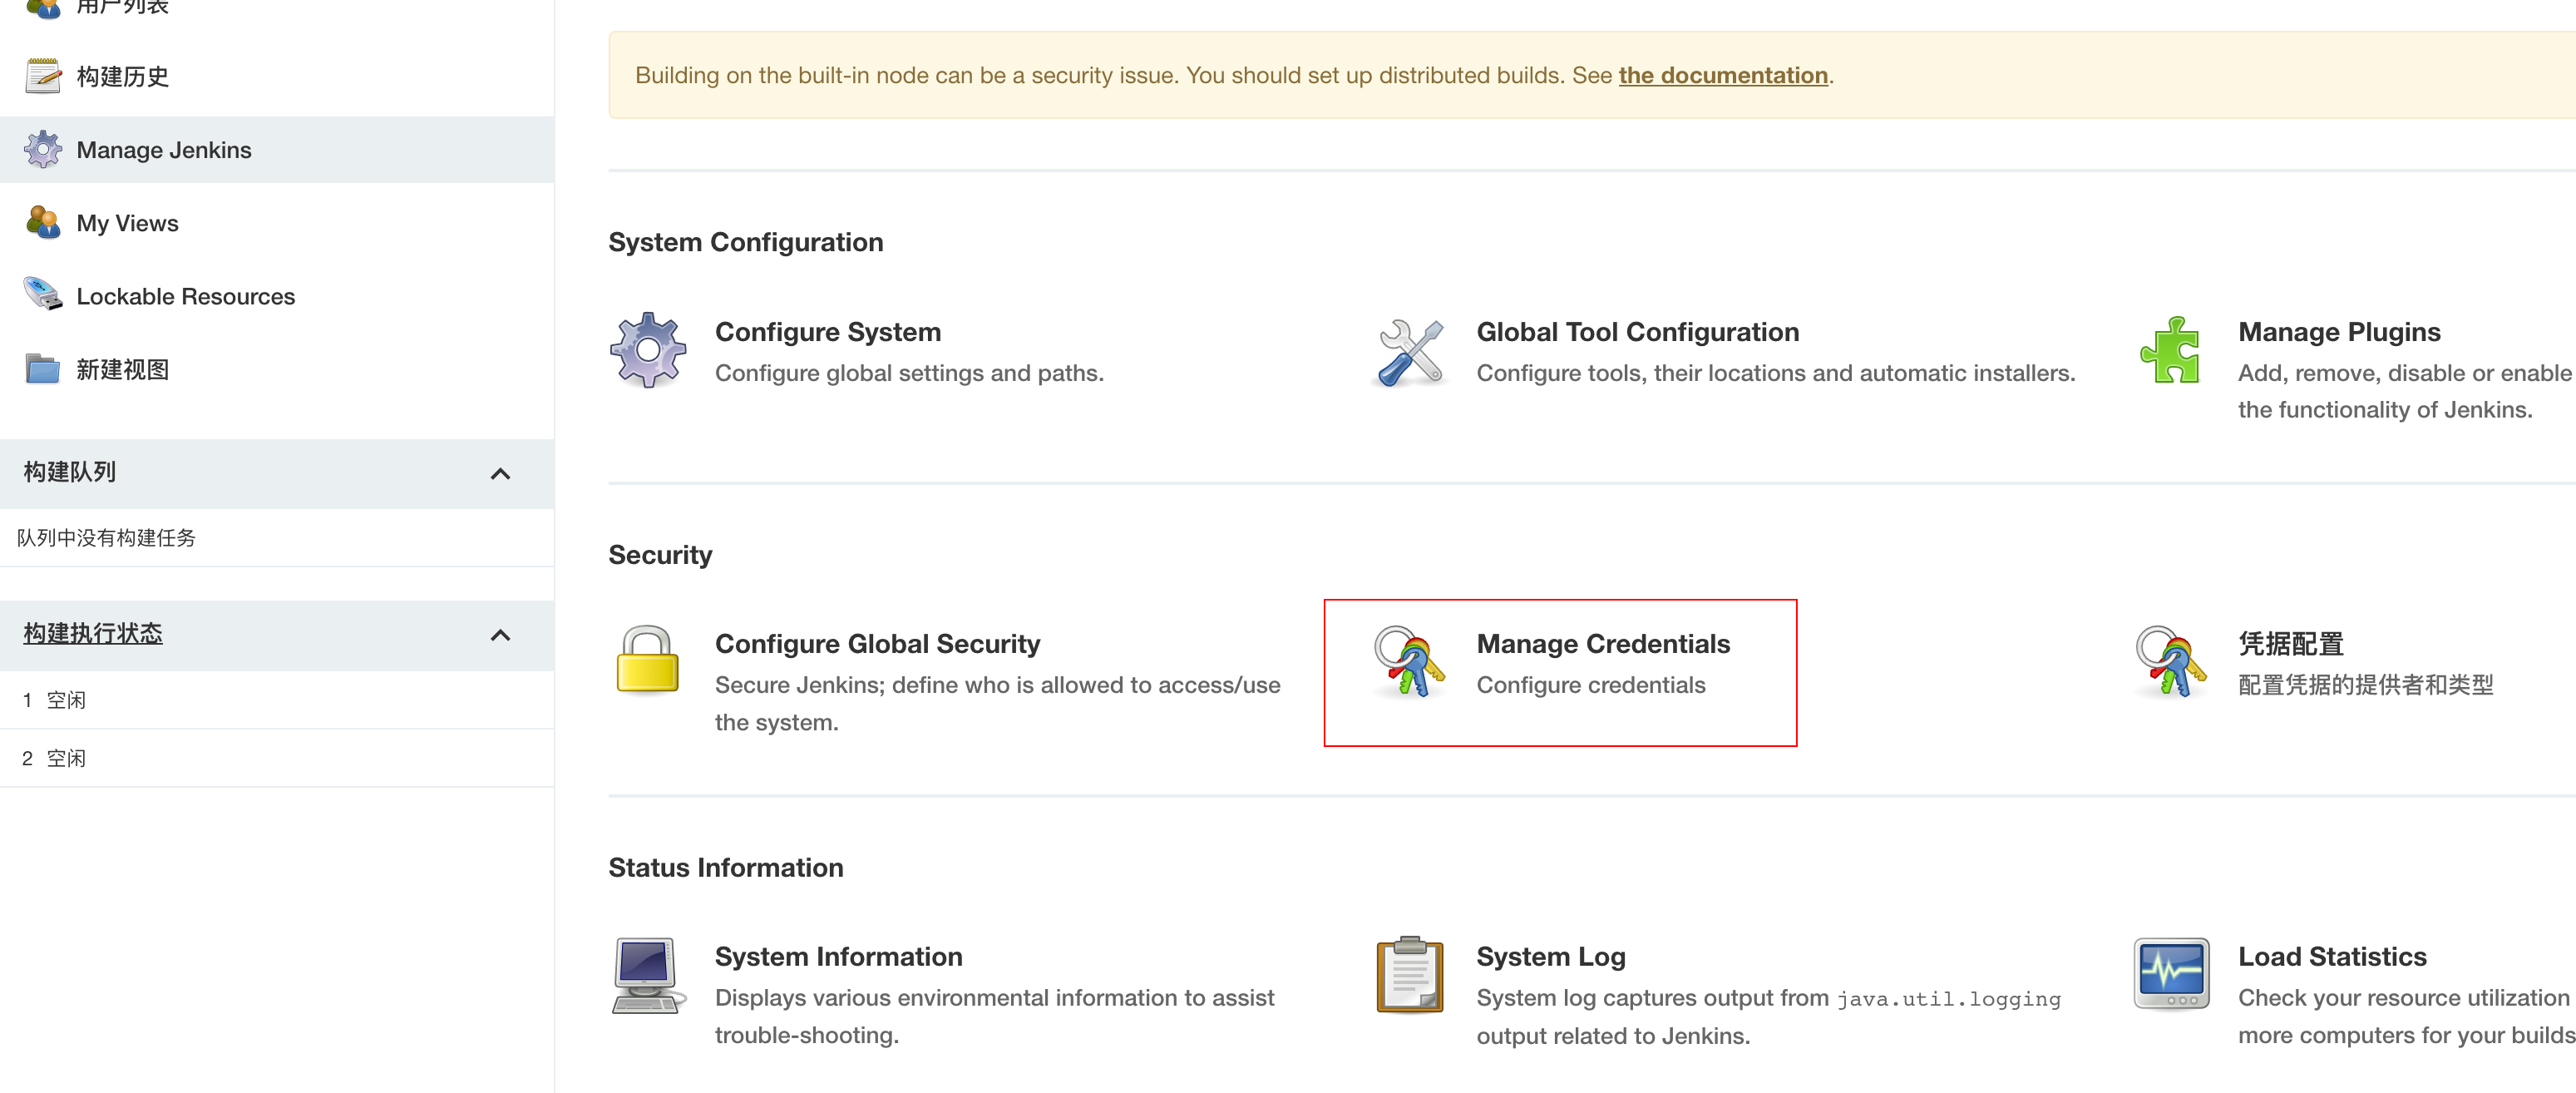
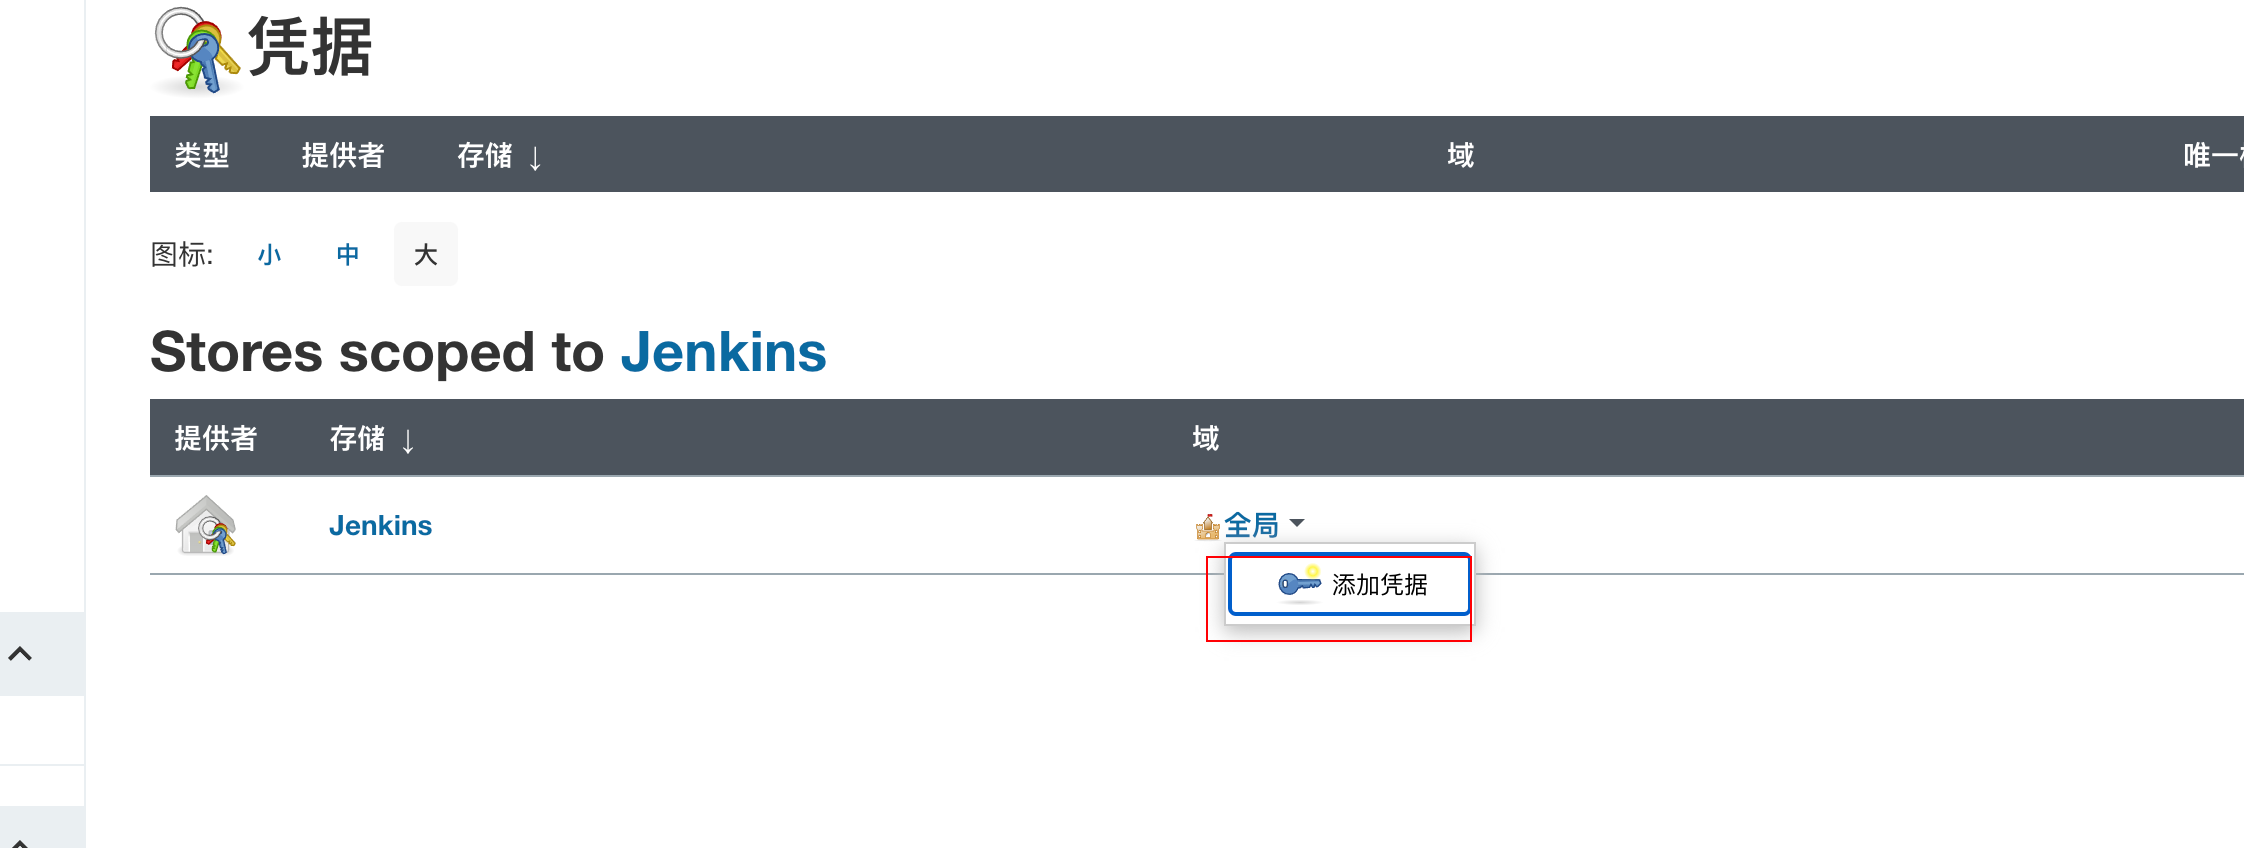
Click on the triangle after "Global" and then click "Add Credits"
Enter the "Add Credits" page, type we choose "SSH Username with private key",Usernameis a gitlab identifier, after which you add pipeline you know this logo is self-defined on behalf of gitlab credentials, rivate Key`, a private key configured in gitlab (previously we have a public key corresponding to gitlab, here is our own private key), our voucher is for jenkins to go to gitlab free of cryptography.
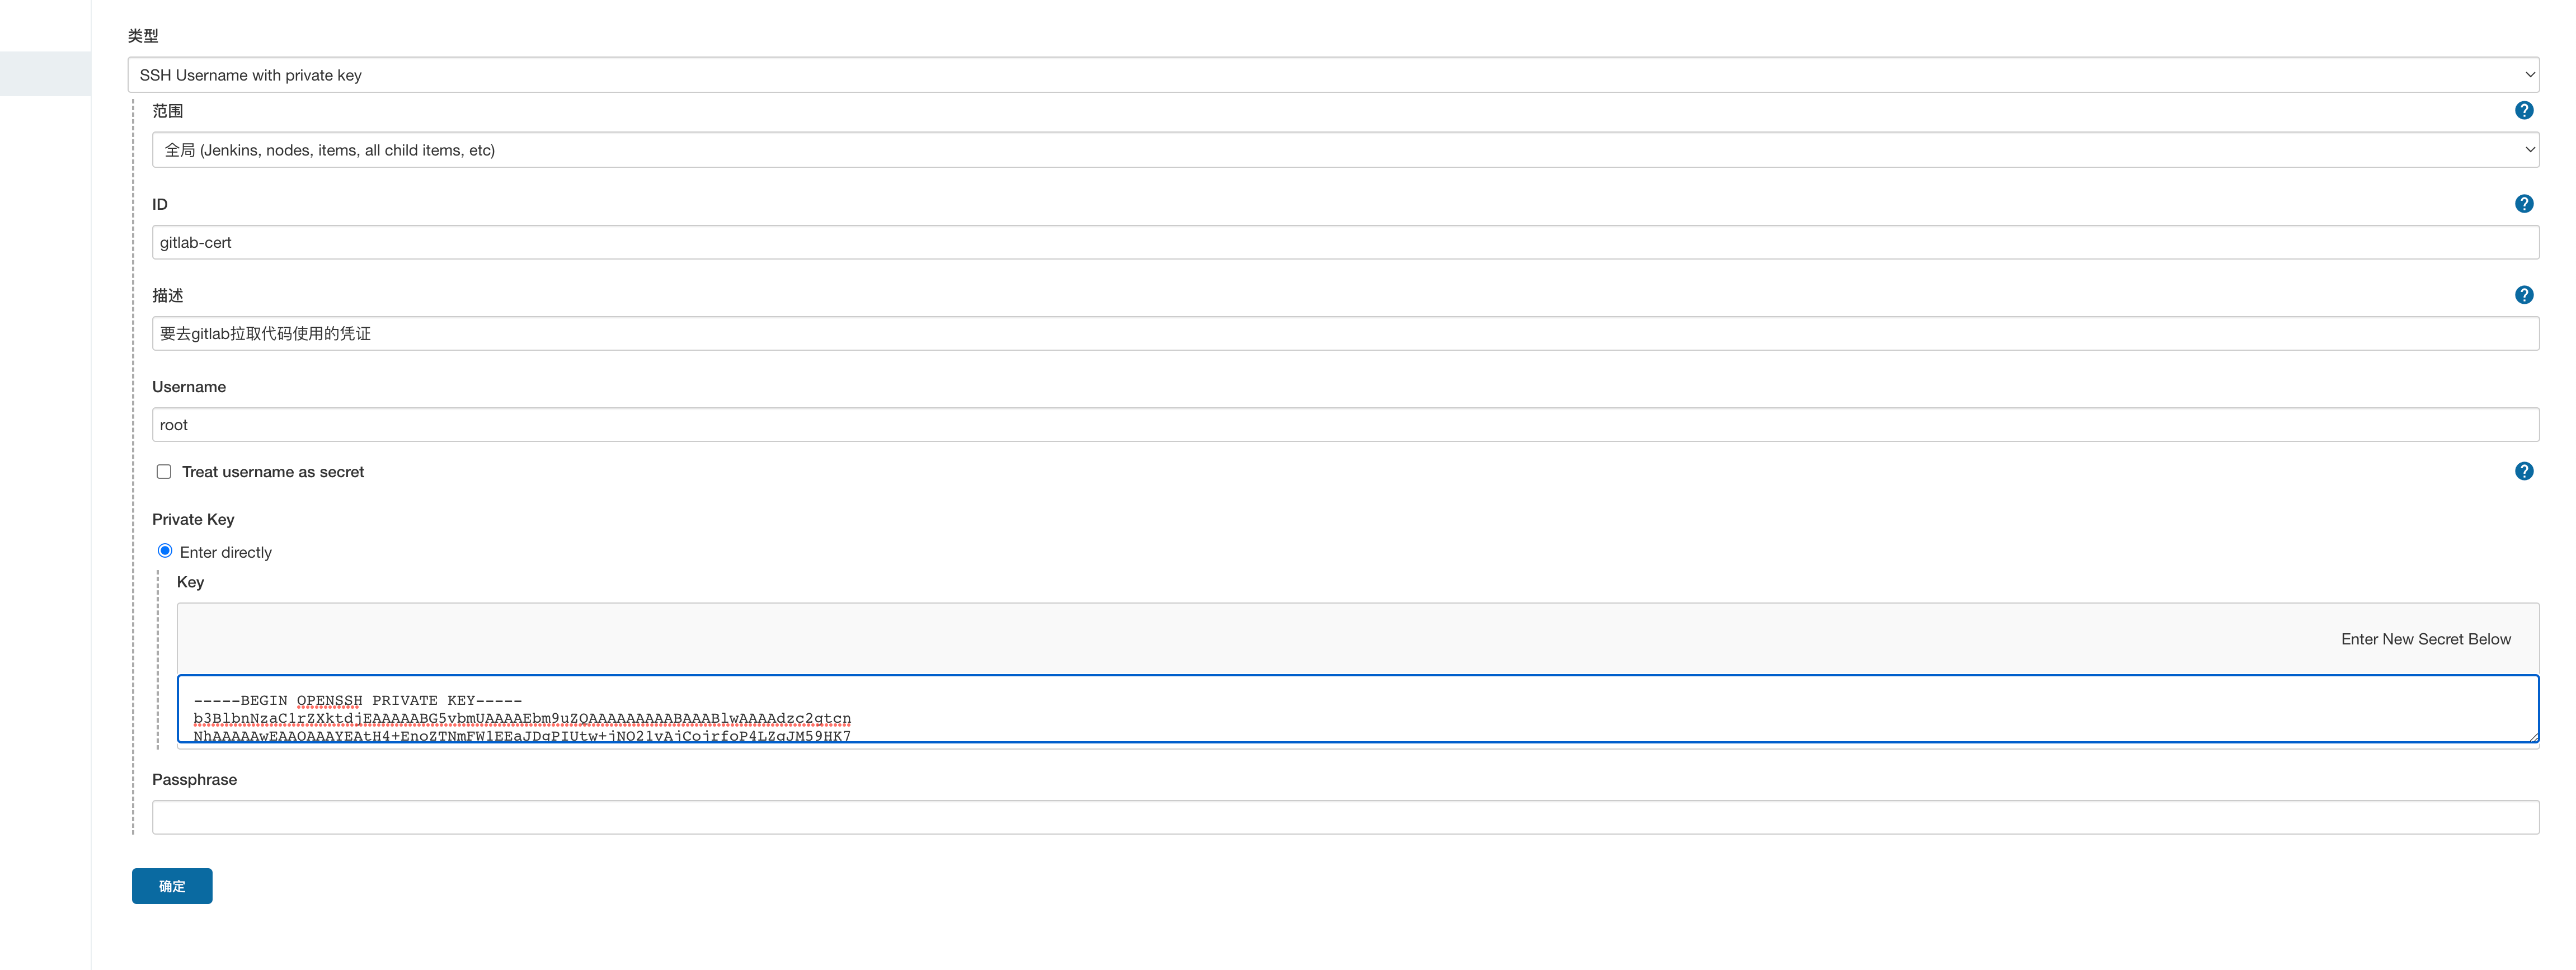
Suffice it.
4.7 Add harbor repository configuration
Go to homepage, click on the menu on the left Manage Jenkins -> Configure System

Swipe down toGlobal Propertiesentry, add docker private repository information such as graphdockerUsername,dockeruser password,dockerprivate repository address
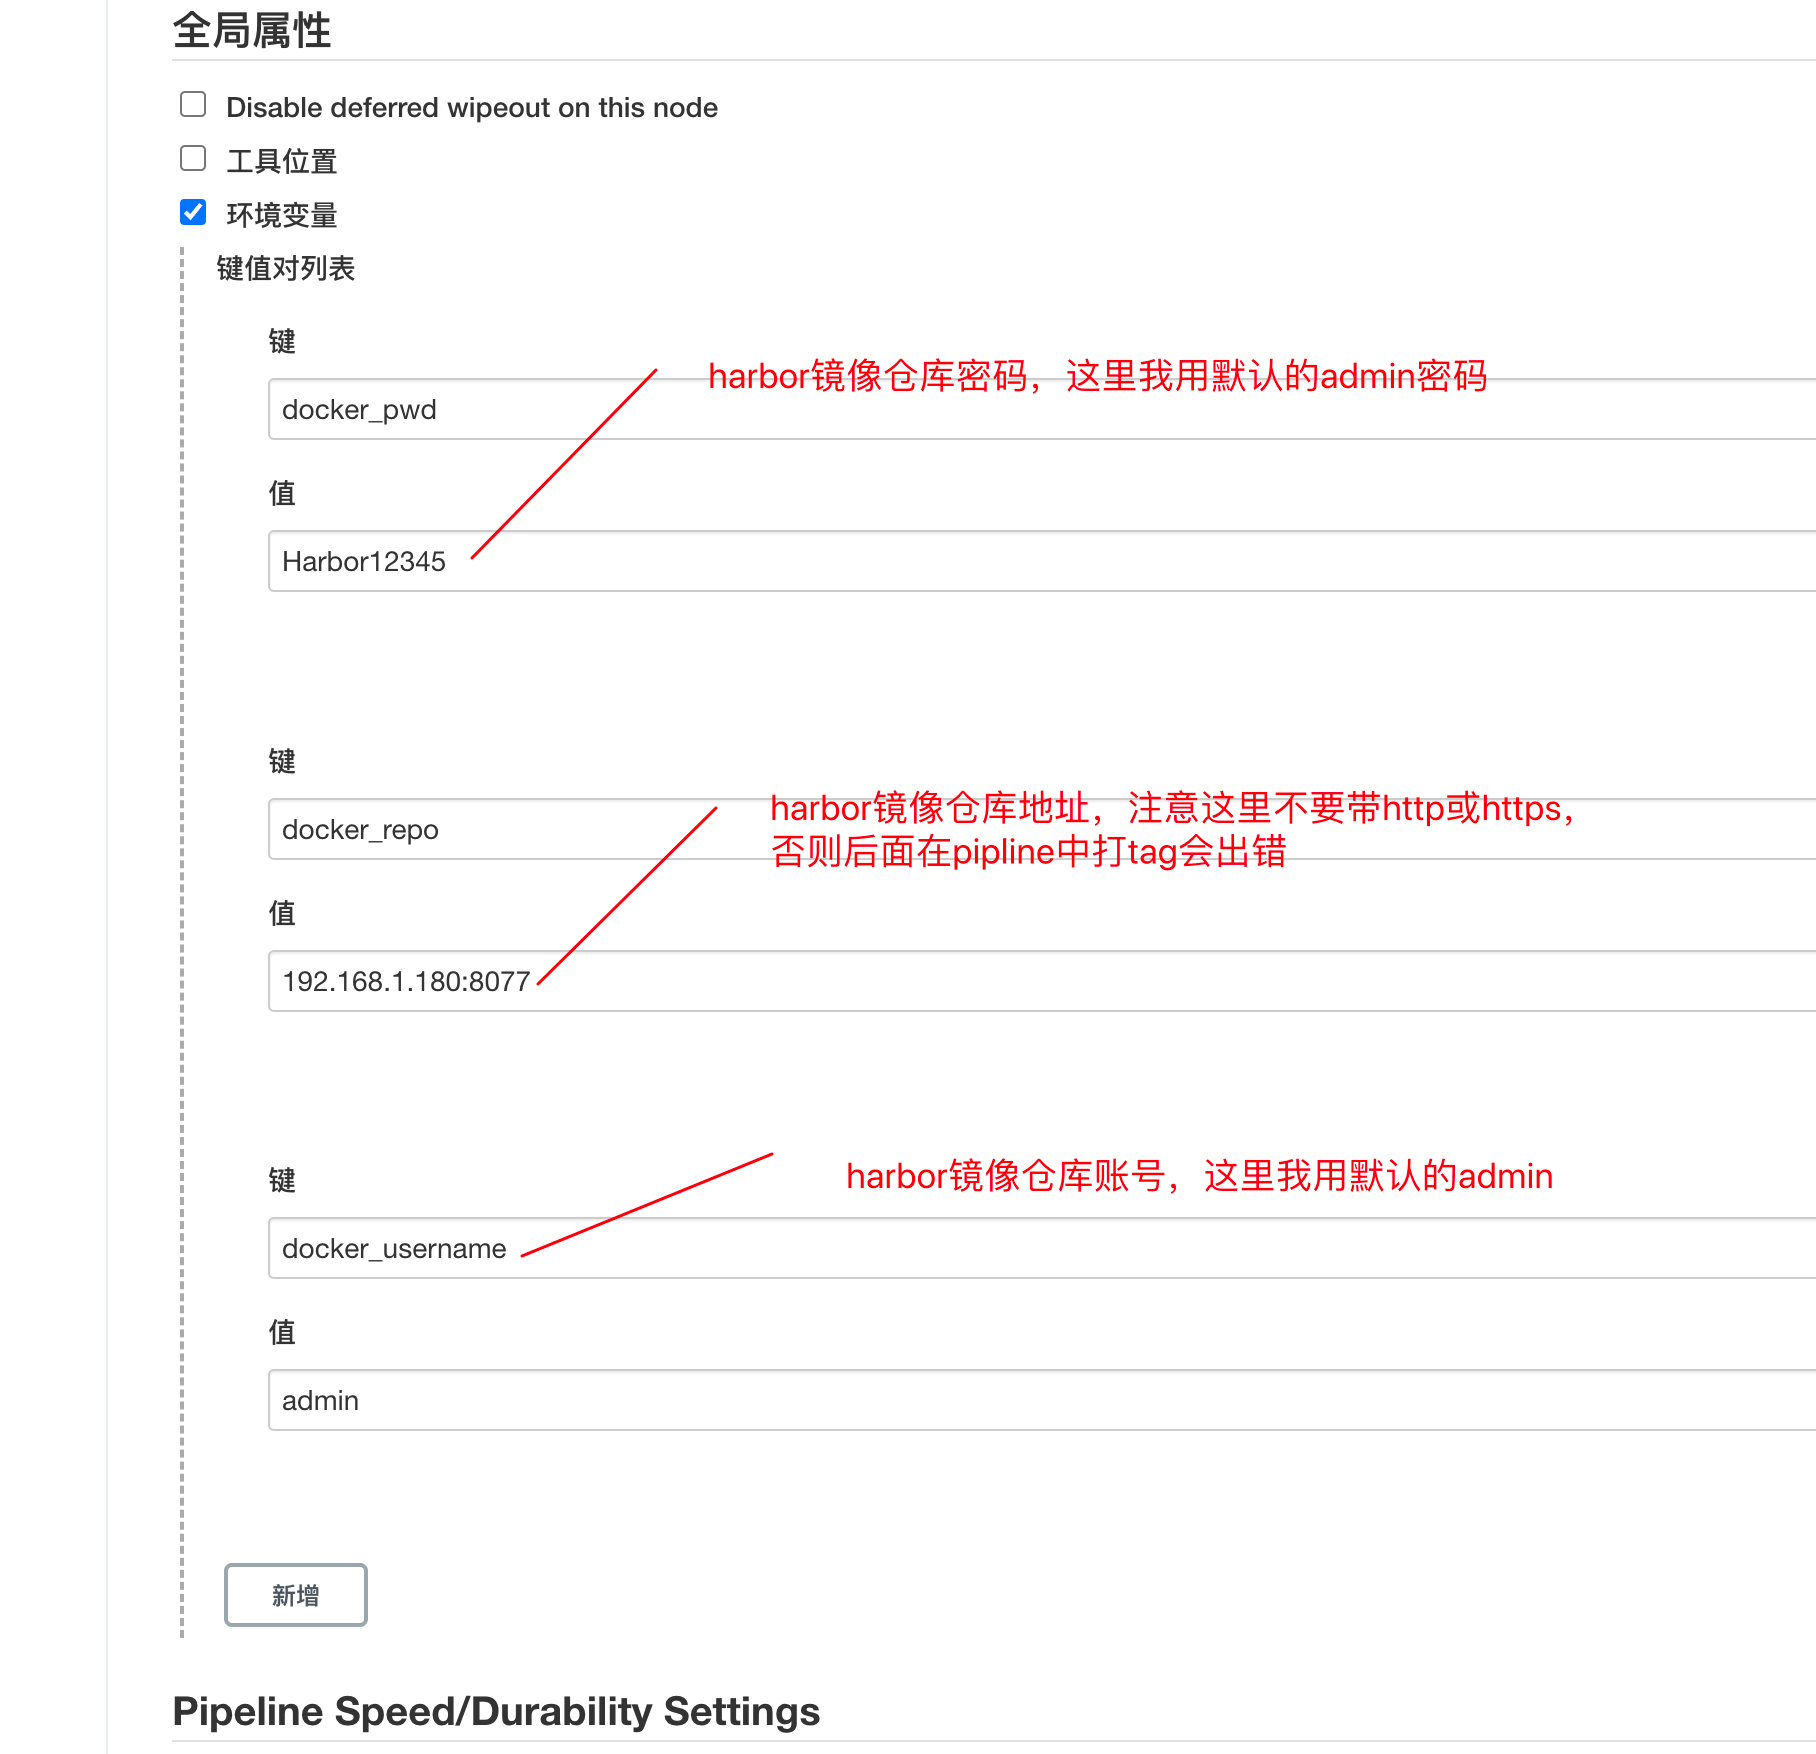
Click to save
4.8 Configure git
EnterManage Jenkins->Global Tool Configuration, find Git entry, fill jenkins in the machine git executable path; if not, download Git plugin in jenkins plugin management and don't need to be taken into custody (graph below)

Git Parameter plugin to configure pipline
Tap "System Configuration" -> "Plugin Management"

Then click "Optional Plugins", type "Git Parameter" in the search, like the one
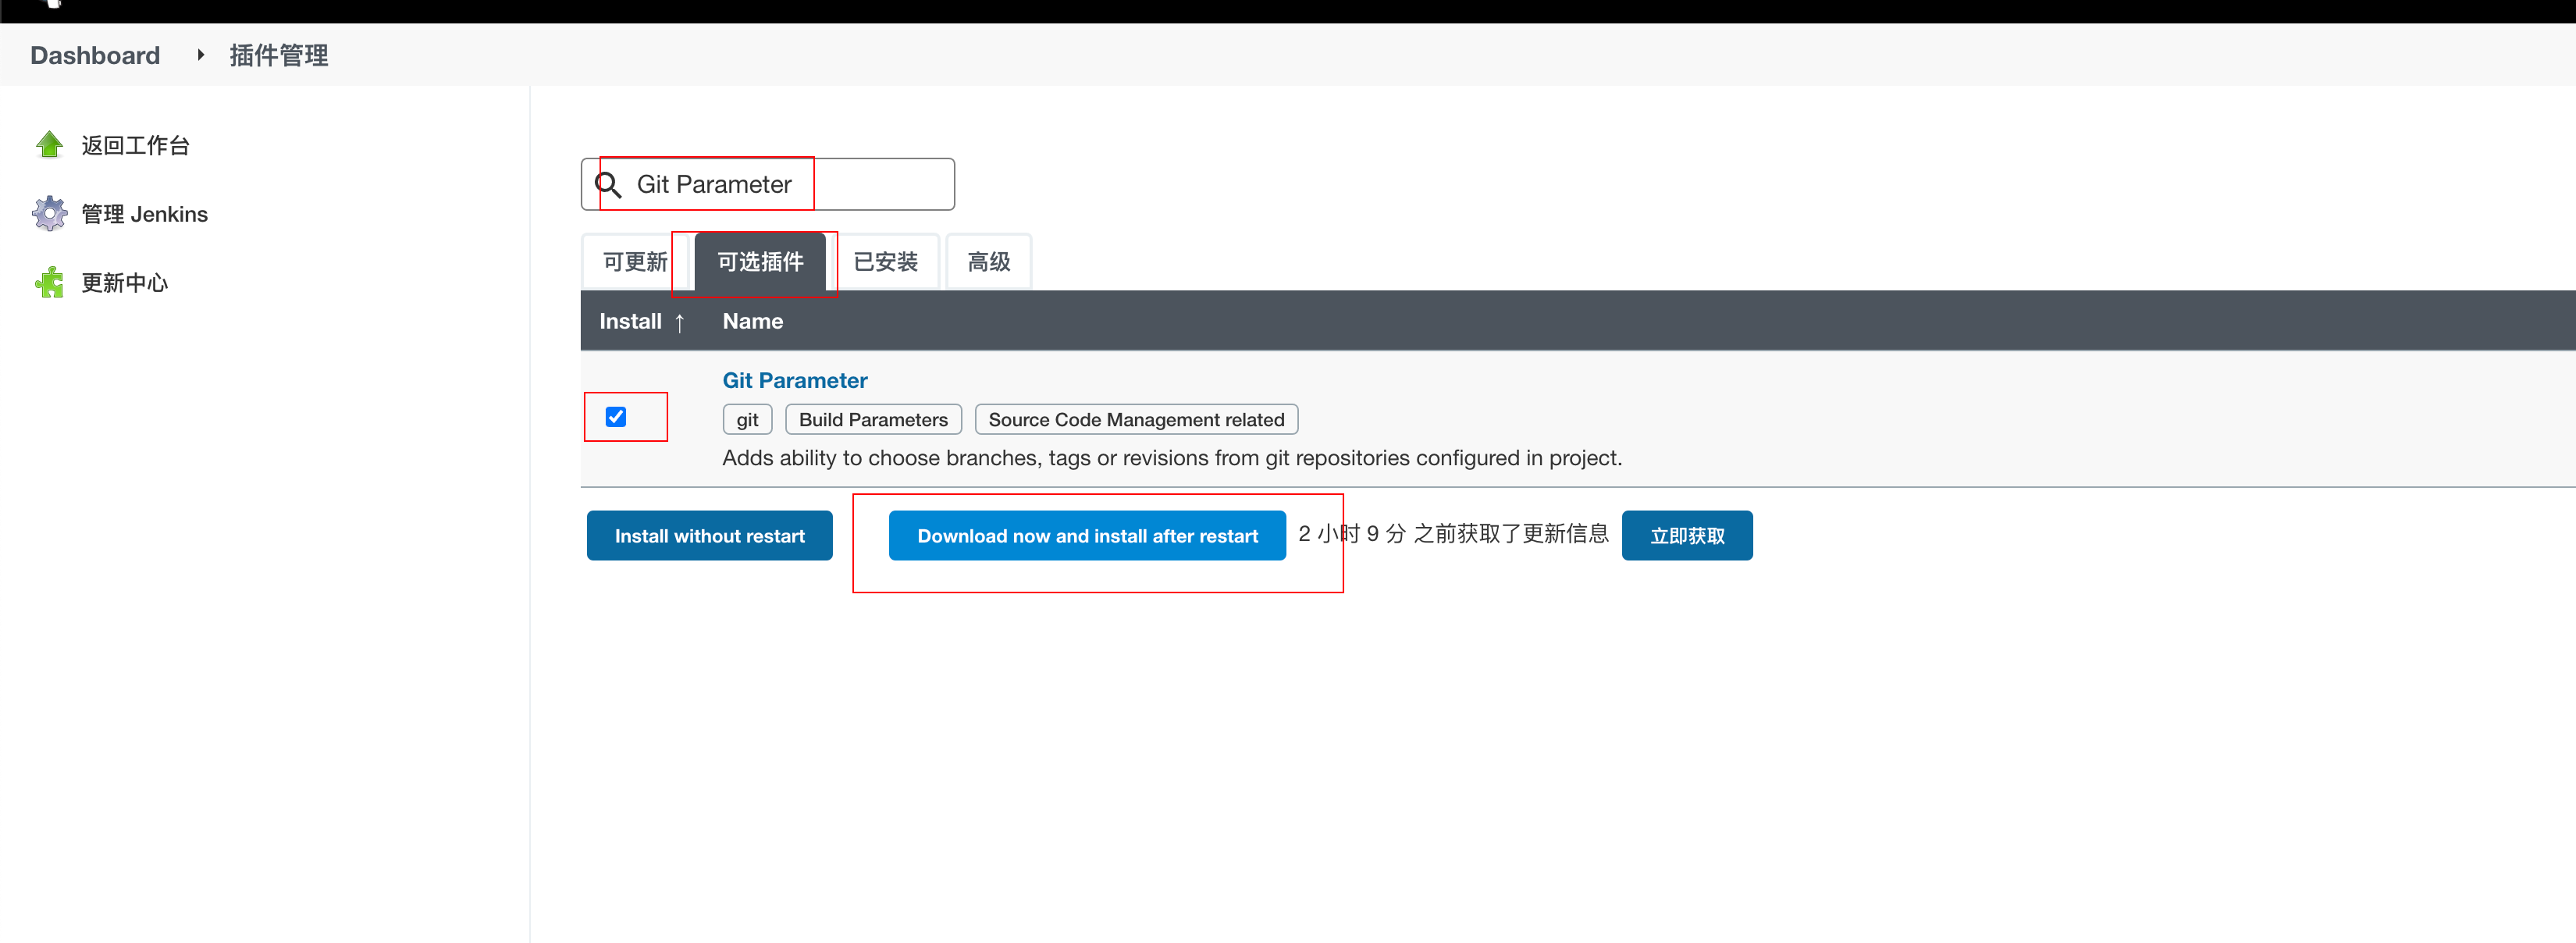
Finished installing and restarting to complete this jenkin.
5、k8s
The deployment of k8s is not described. Use kubeadm, rancher, kind to install it, or buy cloud container services, all with a k8s cluster.